
Quickly add users to your project by importing users. This way, you avoid manual and individual work and can import users in batches to BIMachine. To do this, simply fill in the CSV template available on the platform with user information and then add them to your project.
Step by step
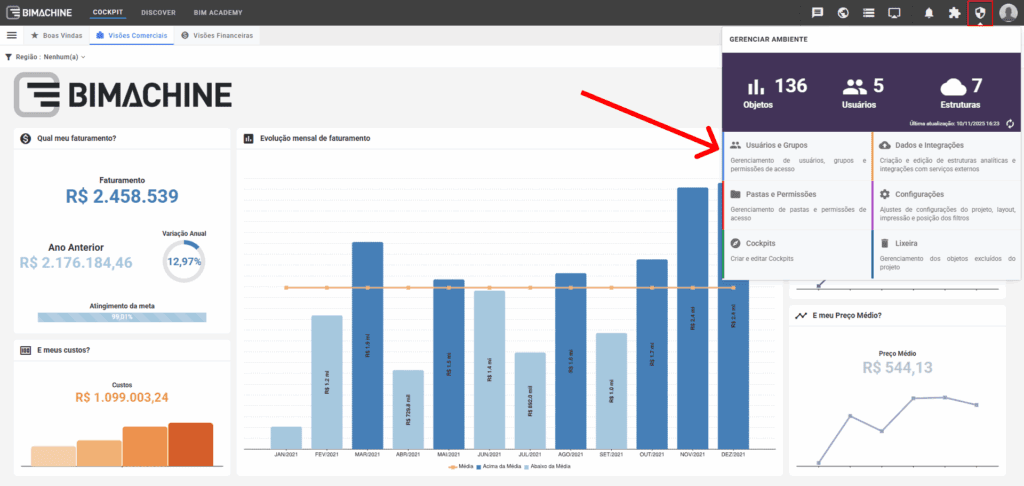
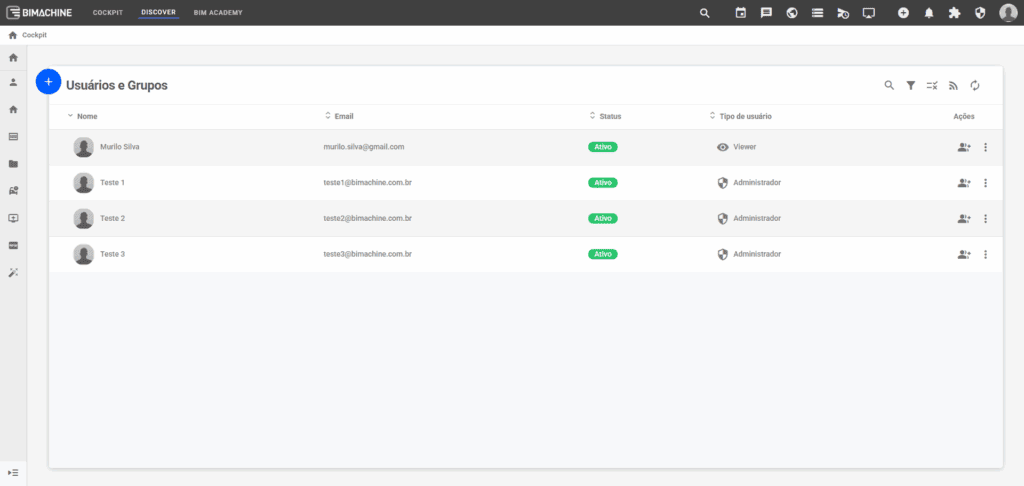
1) Access the users and groups page
In the top menu, access Manage Environment and go to Users and Groups
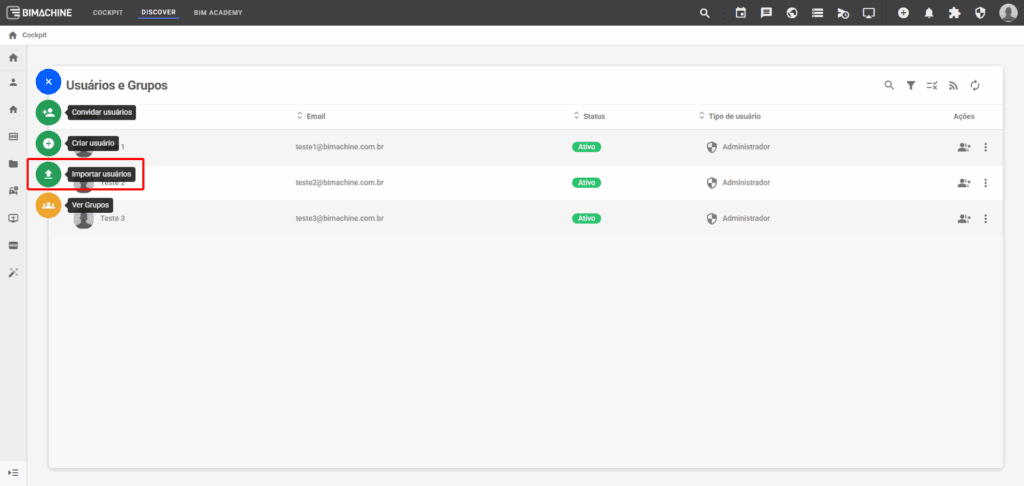
2) Click on “+” and select “Import users”
In the modal that will open, you will find instructions and a summary of the options available for importing.
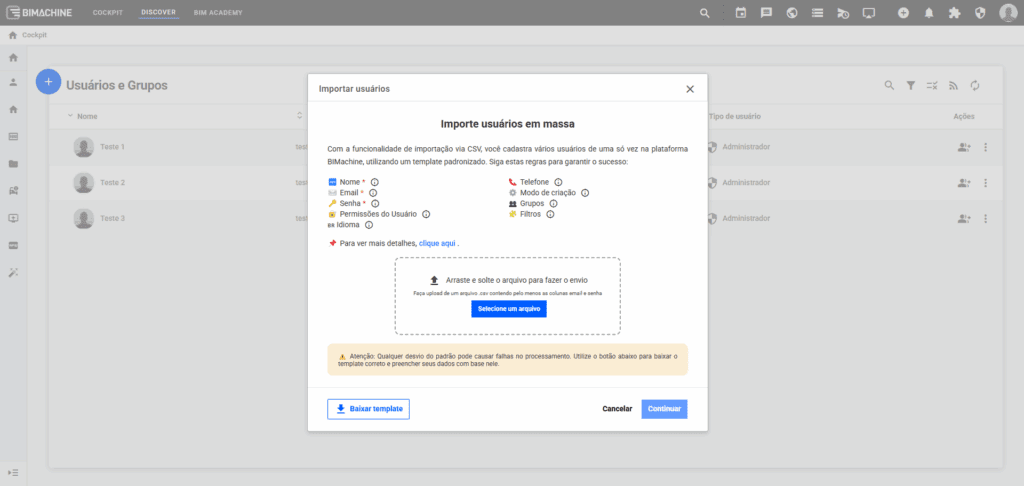
3) Download the CSV template (optional)
If you want to make importing easier, click Download template. Fill in the file with the data of the users you want to add, and then select the updated file to send.
If you prefer to create the CSV manually or better understand each field, see the details of each column below:
- Name: name that will appear on the user’s profile within BIMachine. E.g.: Murilo Silva
- Email: email address used by the user to log in. E.g.: murilo.silva@gmail.com
- Password: password for accessing BIMachine (minimum of 8 characters, containing at least 1 uppercase letter, 1 lowercase letter, and 1 number, according to the Password Policy). E.g.: Password123
- User permission: type of permission in the project: Administrator, Viewer, Expert, or Explorer. E.g.: Viewer
- Language: user’s default language: pt_BR, pt_PT, es, or en. E.g.: pt_BR
- Phone: user’s phone number in international format. E.g.: +55 11 99999-9999
- Creation mode: defines how the user will be added: invite (sends invitation by email) or activate (activates directly). If left blank, it will be active automatically.
- Groups: name of the group(s) to which the user will belong. Separate multiple groups with commas. E.g.: Management, Managers
- Filters: only if you have the data restriction extension per user. Allows you to define which filter members each user can access. “userFilterID” is the filter ID (found in Data and Integrations -> Filters) and to select the members you want to restrict from this filter, enter the names of the members separated by commas in “userFiltersMembersname”, for example.
4) Review and confirmation
After sending the file, the system will display a preview with the users and their information as configured. Review everything carefully.
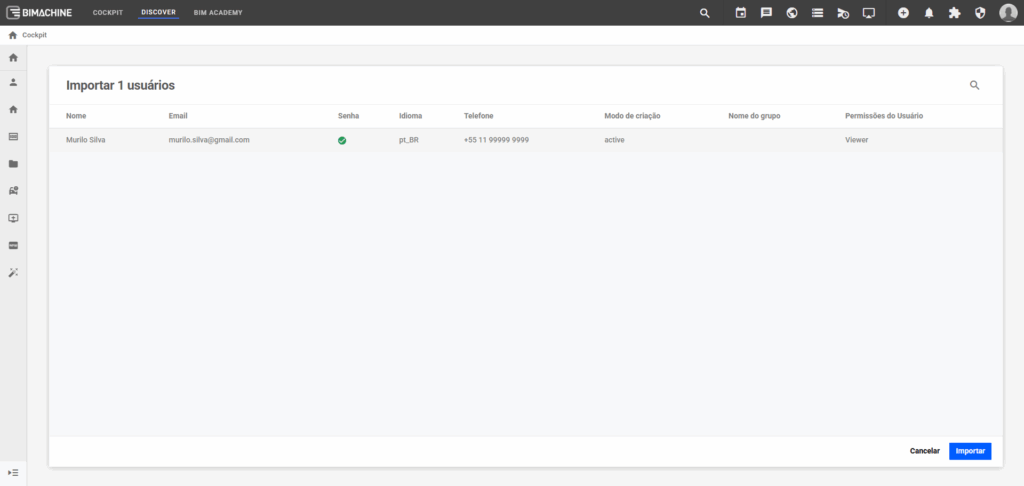
If everything is correct, click Continue to complete the import.
5) Finishing up
After the import is successfully completed, you will be able to view the new users added to the project on the Users and Groups page.
💡 Tip: if an error occurs, review the report displayed on the screen to correct any inconsistencies in the CSV file.
Questions
If you still have questions about the process, please contact the BIMachine Support team.