
If you have a Template project created on the platform and have replicated projects for your clients on it, you can update all these clients according to the changes made to the Template in a few steps.
How to update a project according to the Template
In the scenario below, we imagine that in a recently modified Template project, we have 3 replicas and only one of them is updated according to the changes made in the Template:

From the Replica 3 project, for example, we can request an update for the Template project.

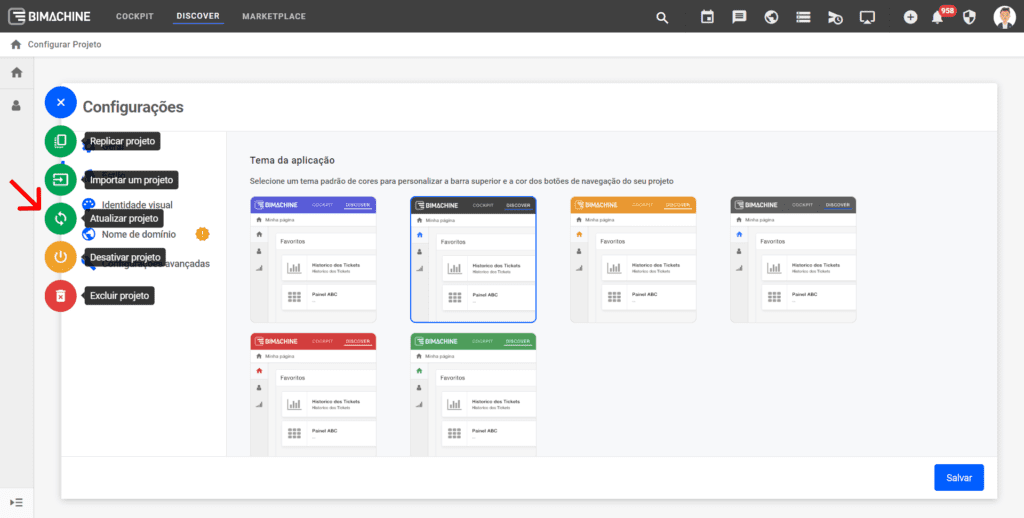
To perform this update, in a Replicated project or with an Import, go to the Settings screen.

On the project settings screen, click on the “+“, then look for the Update project button.
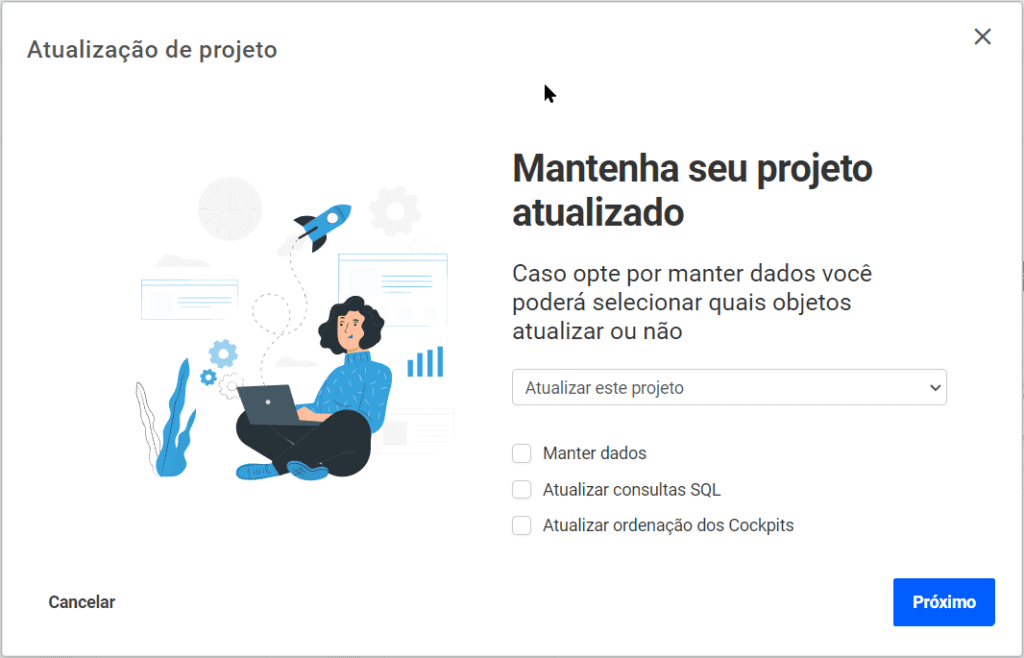
On the project update screen, there are 3 options that can be selected or not:
- Keep data: with this flag enabled, you can validate and choose which objects you want to keep, update or delete. If it is not checked, the flow followed will be to add everything that is new, update everything that has been modified, and remove everything that has been deleted without any choice steps.
- Update SQL queries: Updates the SQL of the structures that are database and BIMachine.
- Update the order of the cockpits: Updates the order of the cokpits defined in the template project for your replica.
In this case we are going to enable the keep data flag, and with it enabled you can only update by choosing one project Template (in this scenario the Commercial app) at a time, choose which Template you want to update accordingly and click Next.

In the Added step, we tell which objects added in the Template project will be added in this replica update.

In the step Modified, we tell you which objects modified in the Template project will be kept, updated or duplicated in this replica update.

In the Removed step we inform you whether the objects removed in the Template project will also be removed in this replica update.

In the last step Validation, the validation and update of the data takes place. Click Confirm and Update to update the replica.

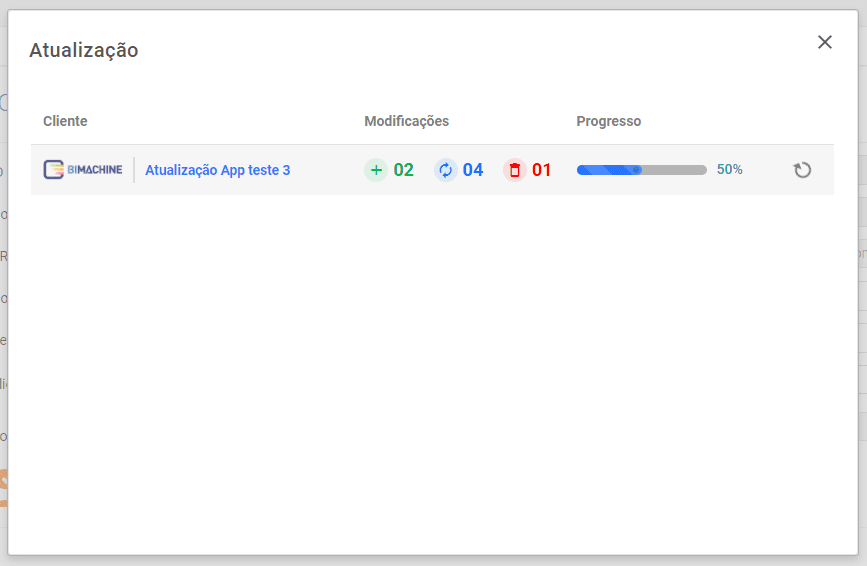
Client: Name and logo of the project to be updated;
Modifications: Objects added, updated, and removed;
Progress: The progress of updating the project, which, depending on its size, can vary the waiting time;
If all goes well, the completion screen will appear:

How to update a project from the Template
We can also from the Template project request the update of all replicas.

To perform this update, in a Template Project, go to the Settings screen.
On the project settings screen, click on the “+“, then look for the Update project button.

In the App maintenance screen, we inform if we want to keep the data, with this flag enabled, we can validate and choose which objects we want to keep, update or delete.

In this case we will enable the keep data flag, and with it enabled you can only update one project at a time, choose which replicated project you want to update according to the Template and click Next.

In the Added step we tell which objects added in the Template will be added in the replica project.

In the step Modified, we tell which objects modified in the Template will be kept, updated or duplicated in the replica project.

In the Removed step we inform you whether the objects removed in the Template will also be removed in the replica project.

In the last step Validation, the validation and update of the data takes place. Click Confirm and Update to update the replica.

Client: Name and logo of the project to be updated;
Modifications: Objects added, updated, and removed;
Progress: The progress of updating the project, which, depending on its size, can vary the waiting time;
If all goes well, the completion screen will appear:
If you have questions about updating an app or a project on the platform, please contact our support.