
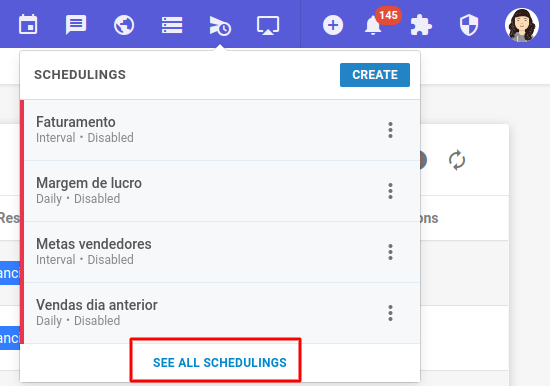
With one or more schedules saved, we can manage these schedules in the menu itself or by clicking on “View all schedules” opening a screen, the difference that in the menu displays a limit in the listing.
A new screen will open with all the schedules created and their settings.
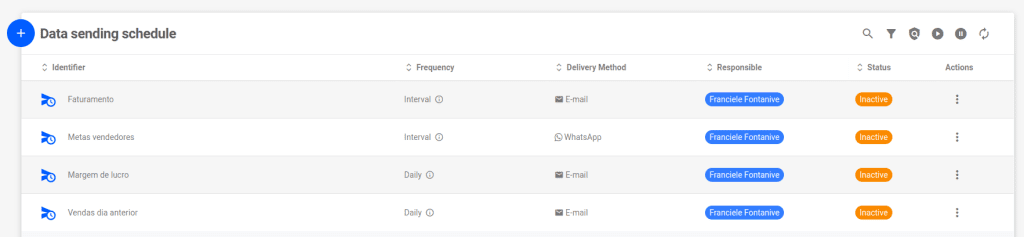
In the top menu you will see some items, being them:

- Do a search by the name of the schedule.
- Filter by: type, status, frequency and responsible.
- Check how the schedules sent with active traceability are going.
- Enable all shipping schedules.
- Disable all dispatch schedules.
- Update.
By clicking on the three dots of a schedule, you can see more information, such as:
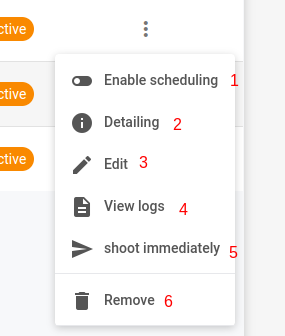
- Enable or disable the schedule.
- View the details of the appointment, such as who sent it and what.
- Edit the schedule.
- Viewing the schedule logs, showing the history of previous submissions.
- Trigger the schedule immediately (it will trigger on time, even if it is scheduled for another time).
- Remove the schedule.