Monitoring can be done directly from the KPI and viewed on the Dashboard. There are three rules to be monitored ("Notification", "Alert" and "Critical") where you define according to the results of your object the type of notification sent the user. The monitoring uses the KPI as an indicator of a trigger action according to the rule you create.
Observation
To be able to use it, enable the Indicator Monitoring extension in the extensions screen. See how to enable an extension by clicking here.
Remember that the monitoring values refer to the values that were defined in the targets in the indicator.
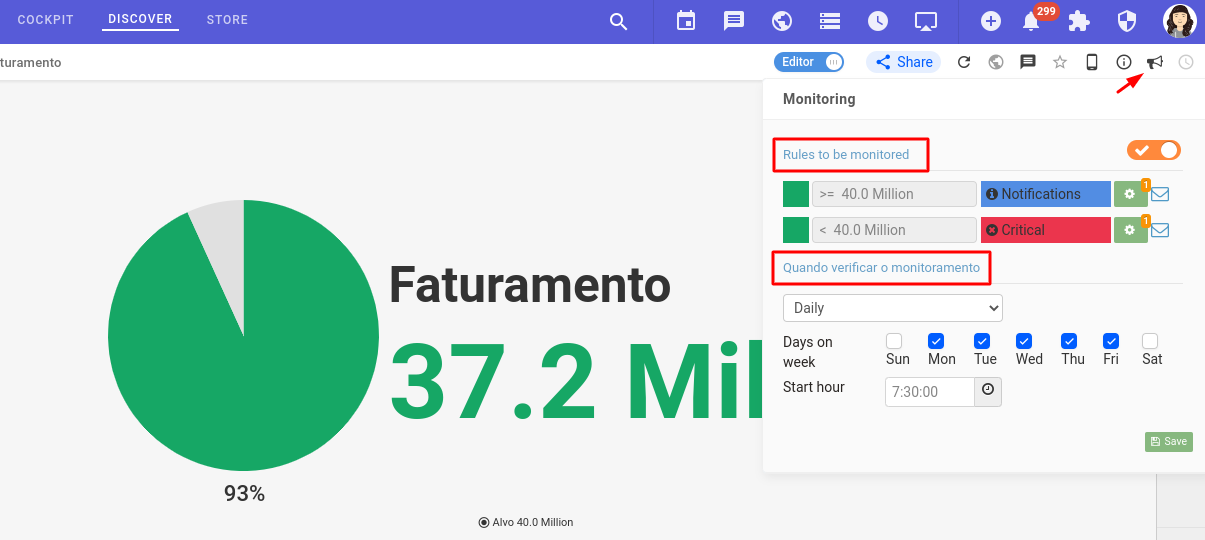
To access the monitoring, click on the icon on the top menu:

See that in the image below we have a KPI with a goal of 40 million, and we have already reached 93% of the goal. Clicking on the icon will open the monitoring settings for the indicator. There we see the rules to be monitored, and in this scenario a message is sent to the user notifying whether the goal was met or not. The values ">=40.0 mi" and "< 40.0 mi" are defined by the target value of the indicator.
We also need to define when we want to receive the monitoring notification. In our example, we set it to monitor from Monday to Friday, at 7:30am, so that our user can see the results of the previous day.

Below is a brief explanation of the monitoring features.
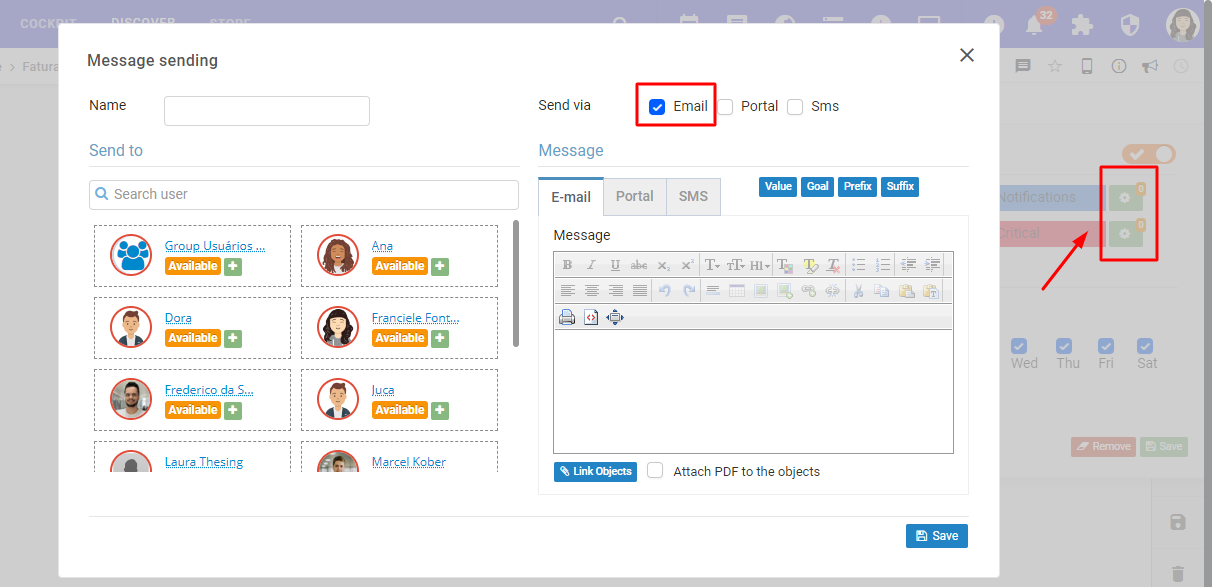
In the "E-mail" option, you have access to the text editor, search field, functionality bar and the list of users. Define who you wish to receive the schedule, make the applications and "Save".

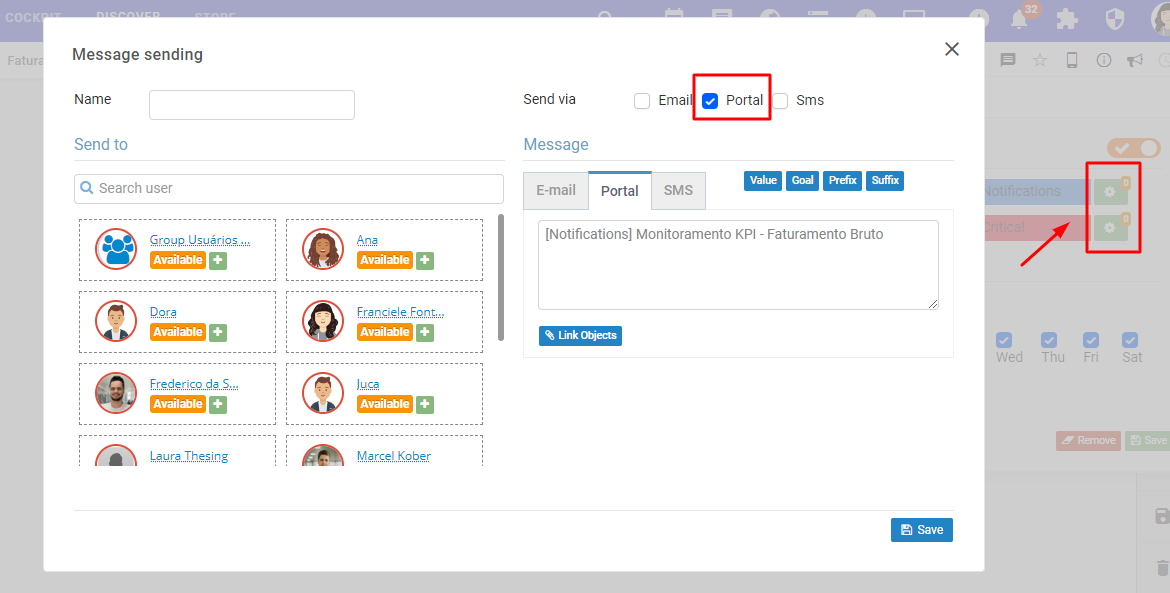
In the "Portal" option, you have a list of users, a feature bar, and access to write a comment.

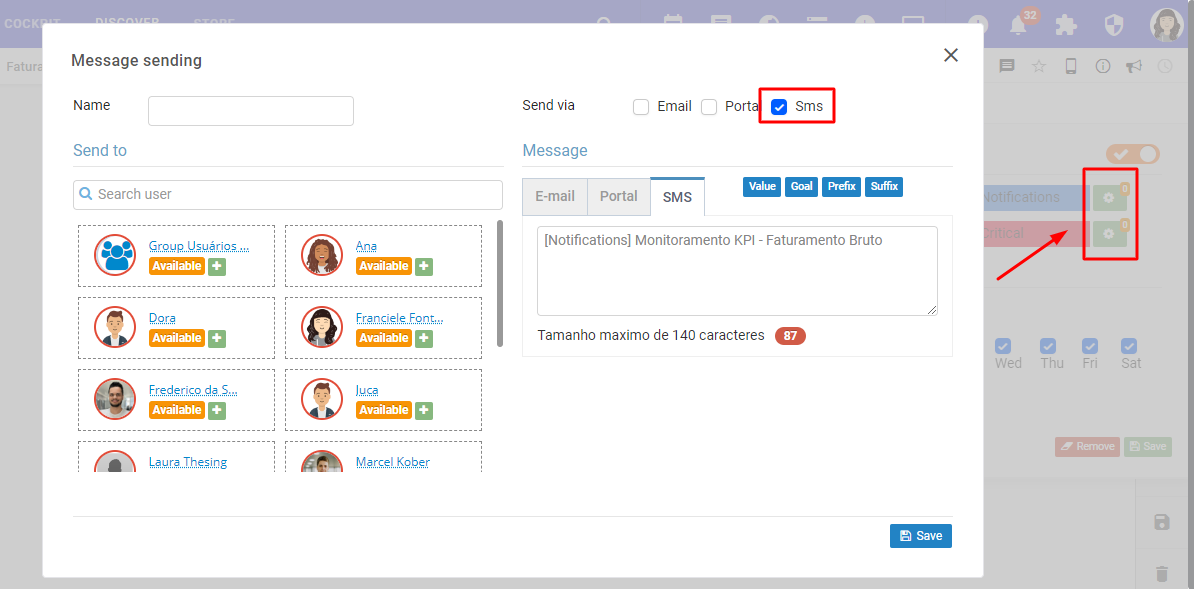
In the "SMS" option, you have a list of users, a feature bar, and access to write a comment.


