Filters are Dashboard elements that provide us with data results and customized information. To create a filter, go to "Data and Integrations" under the "Manage Environment" icon.
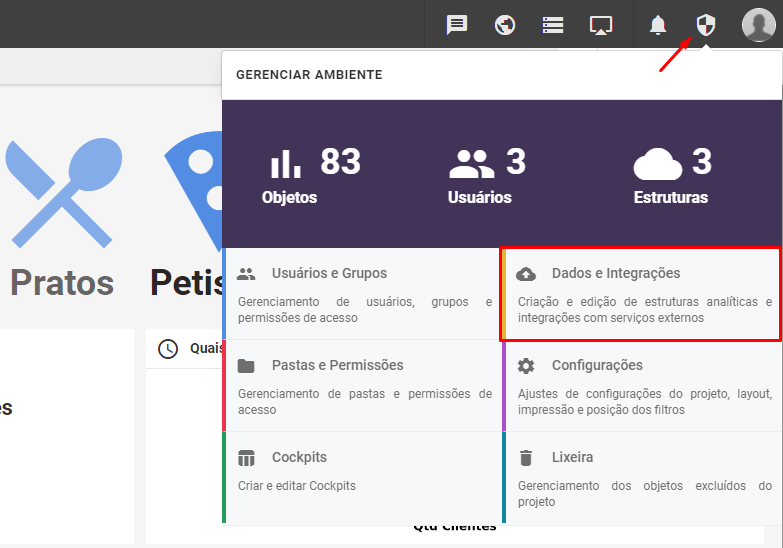
When accessing the Data and Integrations environment, click on the "+" icon, and then Filters.
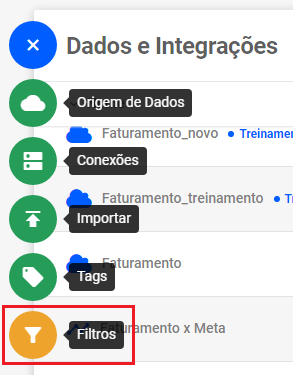
When you click, a screen will open that displays a list of the filters you have created. At the top of the screen, click on "New Filter".
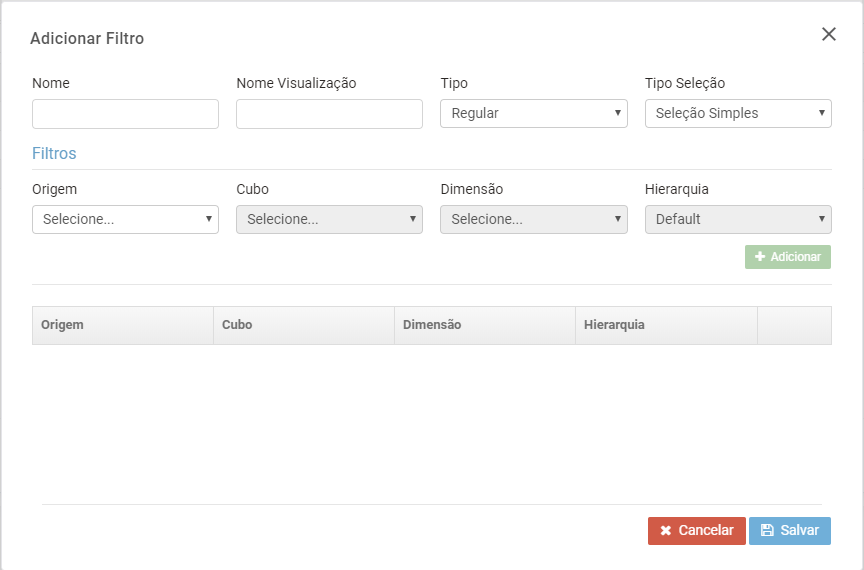
Some warnings:
If you put more than one structure and use regular filters, be careful how the data is, because a small variety may appear in "duplicate" form, with differences: like first capital letter in one, and in the other all capital letters. With this, the filter may not apply to all Dashboard objects.
If you employ the dimension that it is used in an object, problems can occur, so we recommend that you duplicate this dimension and use it in the filter, when the other is applied to the object.
Here is an example Create a filter of the normal type and another of the time type
By creating filters, you can apply them to your Dashboard, limiting the information or searching from an applied filter.
Regular" filters: these are filters with normal dimensions
Simple Filter: a filter that allows only one selection possibility.
Multiple Filter: a filter that allows more than one simultaneous selection possibility.
Time" Filters: are filters with time dimensions
Dynamic Type: is one that does not involve a fixed value, that is, it will vary. Example: Last thirty days.
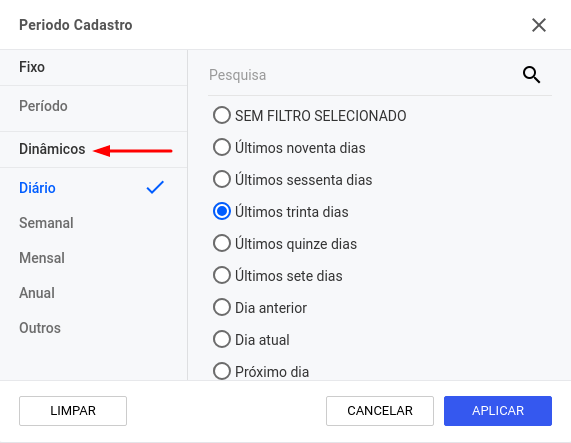
Fixed Type: filter that comprises a certain period. Ex: day 12/24/2018 to make a comparison between expected billing for 12/24/2019. You can also select a range, ex: from day 1 to day 15.
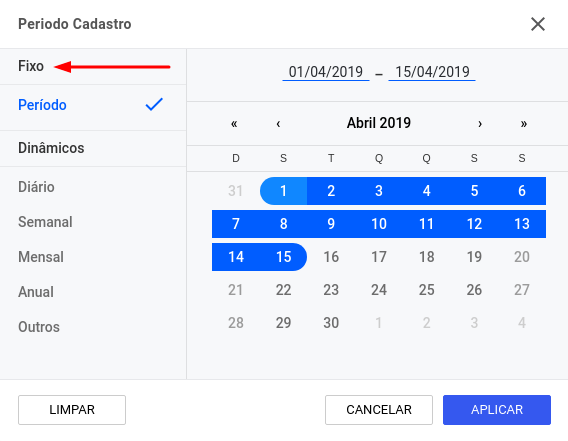
Note: The "Normal" and "Track" types no longer exist. Both have been replaced by the "Fixed" type.

