Creating a Cockpit
To create a cockpit, click on "Manage Environment" and then "Cockpits".
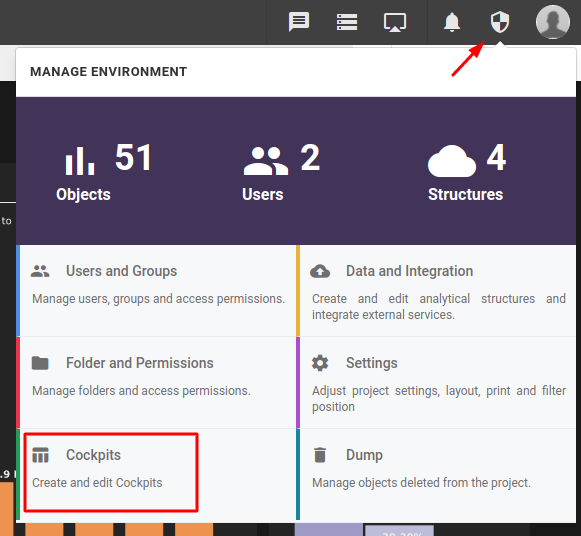
The Cockpit menu will open, and by clicking on the "+" icon we have the option to create a new cockpit.

On the new cockpit screen, we enter the following information:
- Icon: cockpit icon logo;
- Name: name of the cockpit;
- Available on mobile: allow this cockpit to be accessed via mobile application;
We also choose the objects to be added to our cockpit, which can be:
- Cover: initial page of a cockpit (assembled with an image, title, or personalized HTML);
- Index: second page of a cockpit, already added by default, will show all the pages of the cockpit indexed;
- Objects: these can be dashboards, analyses, tables, big tables, maps, or KPIs;
- Page: page that can be used with customized HTML or text;
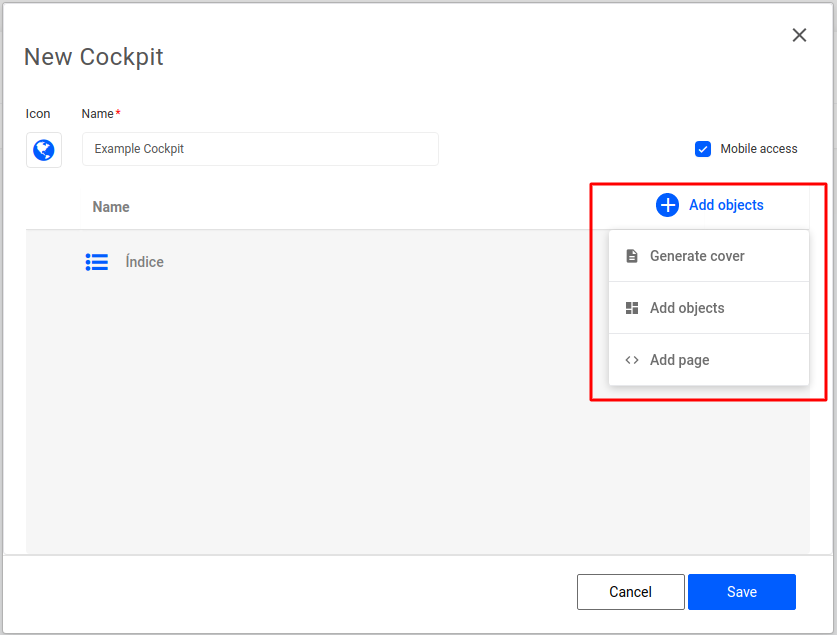
When you have finished setting up the cockpit, click "Save".
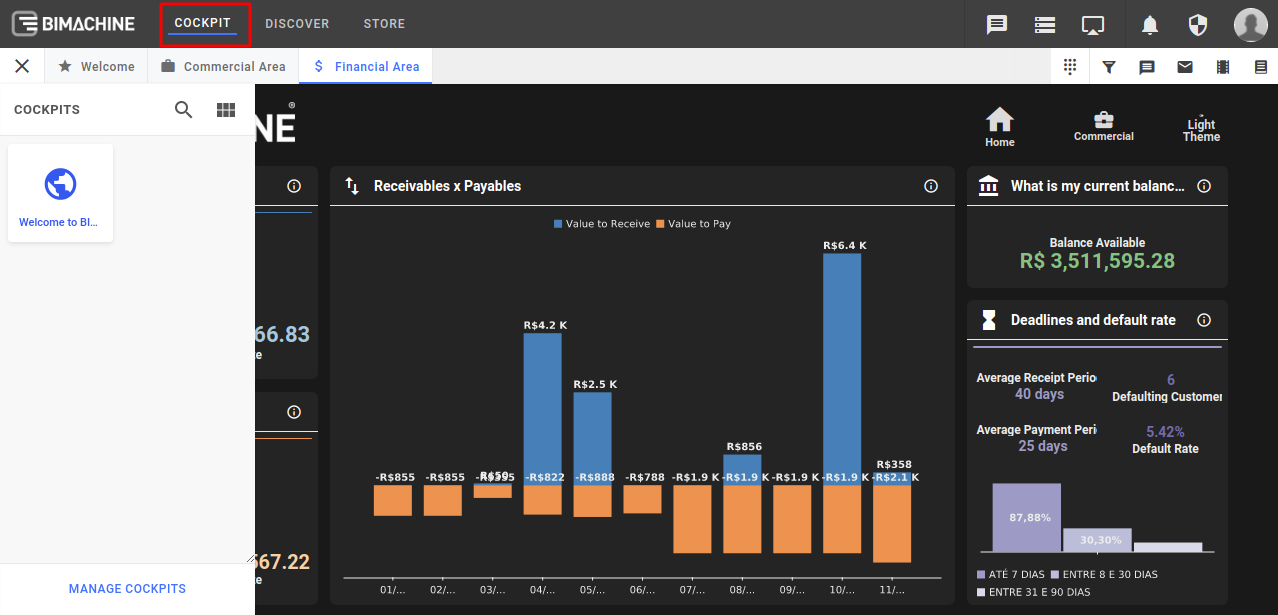
With the Cockpit saved, you can view it in the "Cockpits" tab in the top menu.
Editing a Cockpit
To edit a cockpit, click on "Manage Environment" and then "Cockpits".
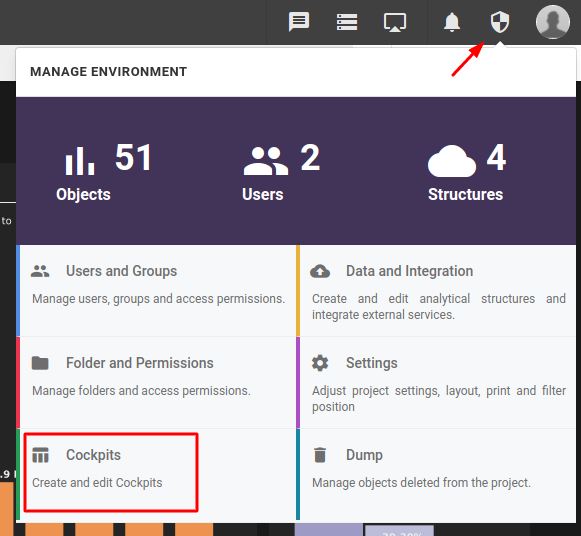
In the Cockpits menu, select the Cockpit you want to edit and from the triple-dot icon menu click on "Edit".
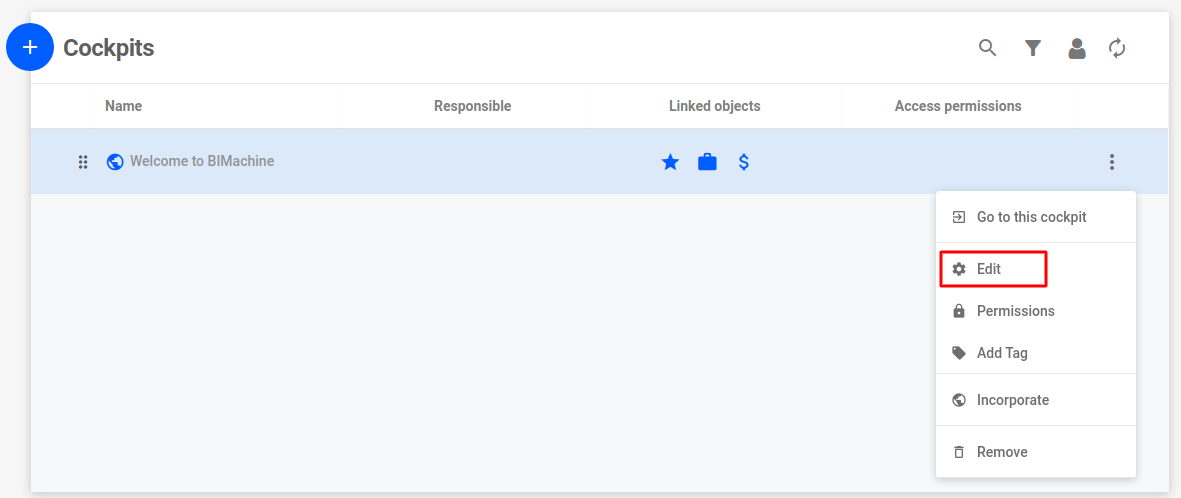
Then make the necessary edits and hit "Save".
Reordering Cockpits
To change the display order of the Cockpits, simply click and drag them using the "Drag" icon


