
What is Olist Tiny ERP v3?
Tiny ERP is a business management solution aimed at micro and small businesses, developed to simplify and optimize day-to-day business processes. The system centralizes essential operations such as sales, inventory control, finance, and invoicing, offering more efficient and integrated business management.
With the Olist Tiny ERP v3 connector, the BIMachine platform allows you to extract data from Tiny in a simple way. The entire flow of collecting, processing, and updating this information is managed by BIMachine, making it possible to transform operational data into visual analyses, indicators, and dashboards.
New authentication process (Olist Tiny ERP v3)
With the evolution of the API, Olist Tiny ERP v3 now uses a new application-based authentication model.
Before integrating with BIMachine, you must create an application directly on the Olist platform. This application will be responsible for authorizing BIMachine’s access to Tiny ERP data.
When you create the application, you will receive the following credentials:
- Client ID
- Client Secret
This information will be used later when configuring the connector within BIMachine.
Creating the application in Olist
To create the application that will enable integration with BIMachine, follow the steps below.
1. Access the Olist platform and navigate to:
Settings → General → Applications
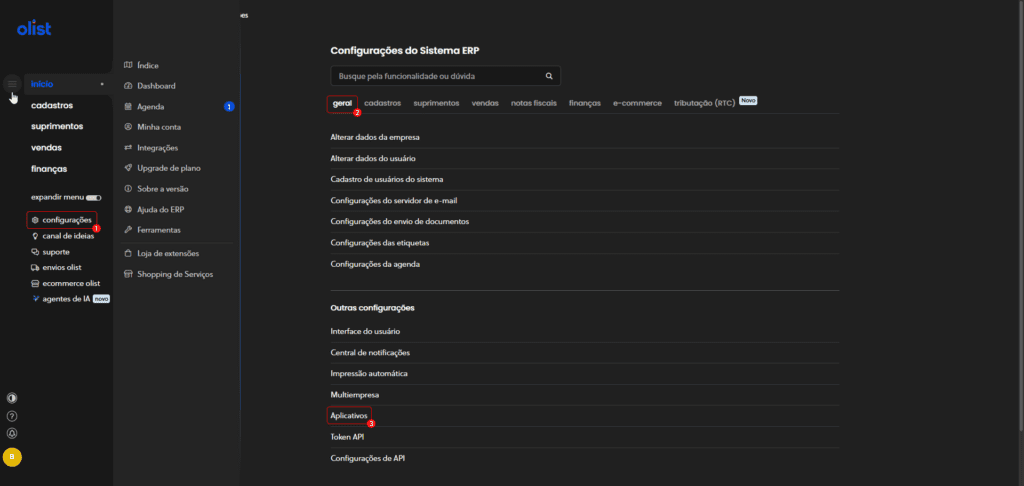
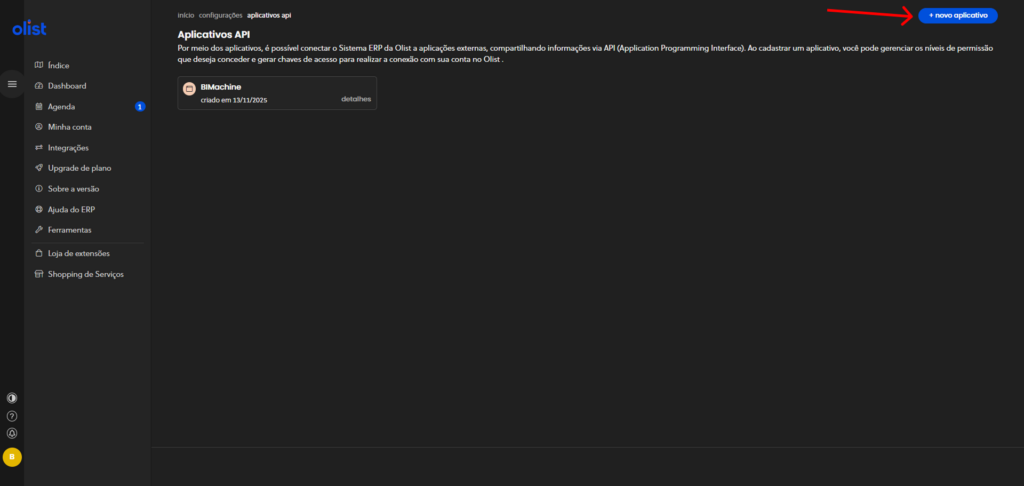
2. On the applications screen, you will be able to view any existing applications, if there are any.
Click on “New application” to start creating a new one.
3. On the application configuration screen, fill in the fields as instructed below:
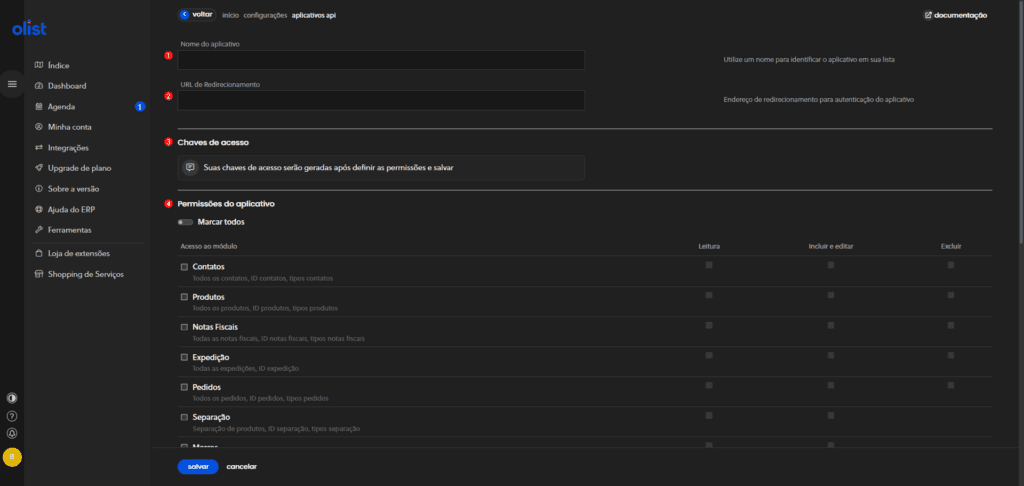
- Application name (1): Enter a name to identify the application within Olist. Suggestion:
BIMachine. - Redirect URL (2): Enter the URL used by BIMachine for the authentication process. Use the exact address:
https://app.bimachine.com/api/origins/tinyV3/auth - Access keys (3): After creation, Olist will automatically generate the credentials: Client ID and Client Secret. These keys will be displayed in this section and should be used later in the BIMachine integration configuration. Warning: these credentials are sensitive and should not be shared publicly.
- Application permissions (4): In this section, you define which Tiny ERP API endpoints BIMachine will be able to access. Select the endpoints you want to make available and, for each selected endpoint, enable at least the Read permission. Tip: to ensure that the integration works properly, select all endpoints with the Read option enabled.
4. After completing the settings, click Save. The application will be ready for use.
Save the Client ID and Client Secret, as they will be needed in the next step.
For more information on creating applications on the Olist platform, you can consult the official documentation: Olist Documentation – API V3 Applications
If you have questions related exclusively to the application creation process or Olist Tiny ERP credentials, we recommend contacting Olist support directly, as they are responsible for this procedure.
Creating the integration in BIMachine
1. In BIMachine, go to Manage Environment and click on Data and Integrations.

2. Click on the “+” icon and select Data Source.

3. In the integration selection pop-up, locate and select TinyERP v3.

4. You will be redirected to the screen for creating the new data structure. Enter: Structure Name and Description. Then click Next.

5. In the connection step, enter:
- Client ID: generated in the Olist application
- Client Secret: generated in the Olist application
- Login: log in with your Olist account
Then select the type of integration you want to perform.

Once completed, a new analytical structure will be created within BIMachine, allowing you to view and analyze data from Olist Tiny ERP v3.
If you have any questions, you can contact Tiny ERP support for more information.
If you still need help, please contact us!