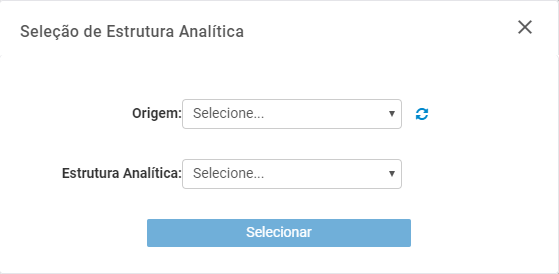
This will open a screen showing the structures that contain Georeferencing, so select the Origin and the analytical structure you want.

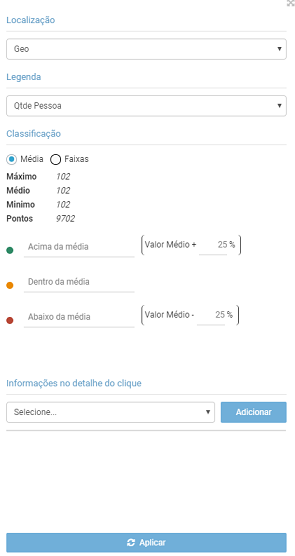
Choosing this will open the map with a left side menu and the display menu. Once you have set the structure, you will see the map on the left-hand side of the map menu. You can set it:
- Location: definition of georeference.
- Legend: definition of the points shown on the map, where you can mark which one you want to see.
- Classification: definition that depends on the type of information chosen in the legend (Measures, Regular, Time).
- Measures: will show Average and Bands in the classification.
- Average: defines the legend chosen, in this case Measures, by placing the percentages on the targets. The map will display colors according to the target achieved.
- Ranges: defines the rules for a point, stating the color, presentation description in the legend below the map, logical operator and value on it to validate the point for display or not.
- Regular: displays all the information contained.
- Time: displays information about the years shown.
- Information in the click detail: when you add a field, you will see it at each point when you hover the mouse.
- At the top of the map is a menu of buttons:
 Define the proximity you want to keep fixed on the map.
  Defines and enables the heat map, when clicked it will display a panel configuring the attributes for the heat map display.
 Enables and disables markers on the map. Changes are made after saving the object and reloading the page.
 You can define whether you want the Discover map to update automatically with each adjustment made in the map menu, or whether you want to apply the changes to the map after you have defined everything. By default it is already activated, if you want to deactivate it you will have to click on the “apply” button in the map menu at the bottom.
 Adjust the georeferences contained in the chosen map structure if necessary. When you have finished defining what you want on the map, click on “save as” in the right-hand menu of the BIMachine (Tools Menu), choosing the location and name of this map. You can then click on save if you want to change anything.

Learn more about the functionalities of this object: Georreference.

